Set up your BikeFinder
How to install the app and log in?
Download the BikeFinder App on the App Store|Google Play.
After successfully installing the app, you can continue to create an account and get started. Make sure you give the Bikefinder App permission to “Notification, Bluetooth, and Location”.
• Open the app and enter your e-mail you want to use.
This email address is designated for your Bikefinder device, and it is crucial to use the same email that you have purchased a subscription with. This ensures the Bikefinder app will recognize the subscription you have purchased and receive comprehensive updates regarding your tracker’s status and location. We advise using the same email to login on the website and the Bikefinder app to minimize any potential confusion.
• Once you have submitted the mail, you’ll receive a one-time generated code.
For every unique login attempt, you’ll receive a unique auto-generated code which you will receive in your mail inbox. Make sure to use the latest code, as you will receive several codes if you make more than one attempt to login.
Now it’s time to add your Bikefinder tracker to the BikeFinder App.
Refer to the section below for more information.
Login issues?
Please check out our FAQ-”Login issues?” section if you failed to login.
How to add your BikeFinder Tracker to the app?
Before you start, turn Bluetooth on in your phone’s settings. Make sure your phone has internet access, and allow the Bikefinder App to have access to notifications and locations.
First time: Charge your Bikefinder tracker for a minimum of 3-4 hours via outlet power socket, as the device has not been charged and has been flat for a long period. After 30 minutes, the tracker should wake up, and it should indicate a red LED-light. Read more about LED-lights here.
If it doesn’t indicate any LED-light, you may try to plug in and out the charging cable 5-6 times at 30-second intervals, or may try to charge it overnight. If it still doesn’t indicate any LED-light, please make sure that you have been trying to charge the tracker with the correct equipment and according to the manual. If you’re not sure, check out this article on our FAQ page.
Note: The LED lights on the Gen 2 tracker are not intended to reflect charging or operational status. For accurate status updates, we recommend using the app
Now, let’s set up your tracker in the app.
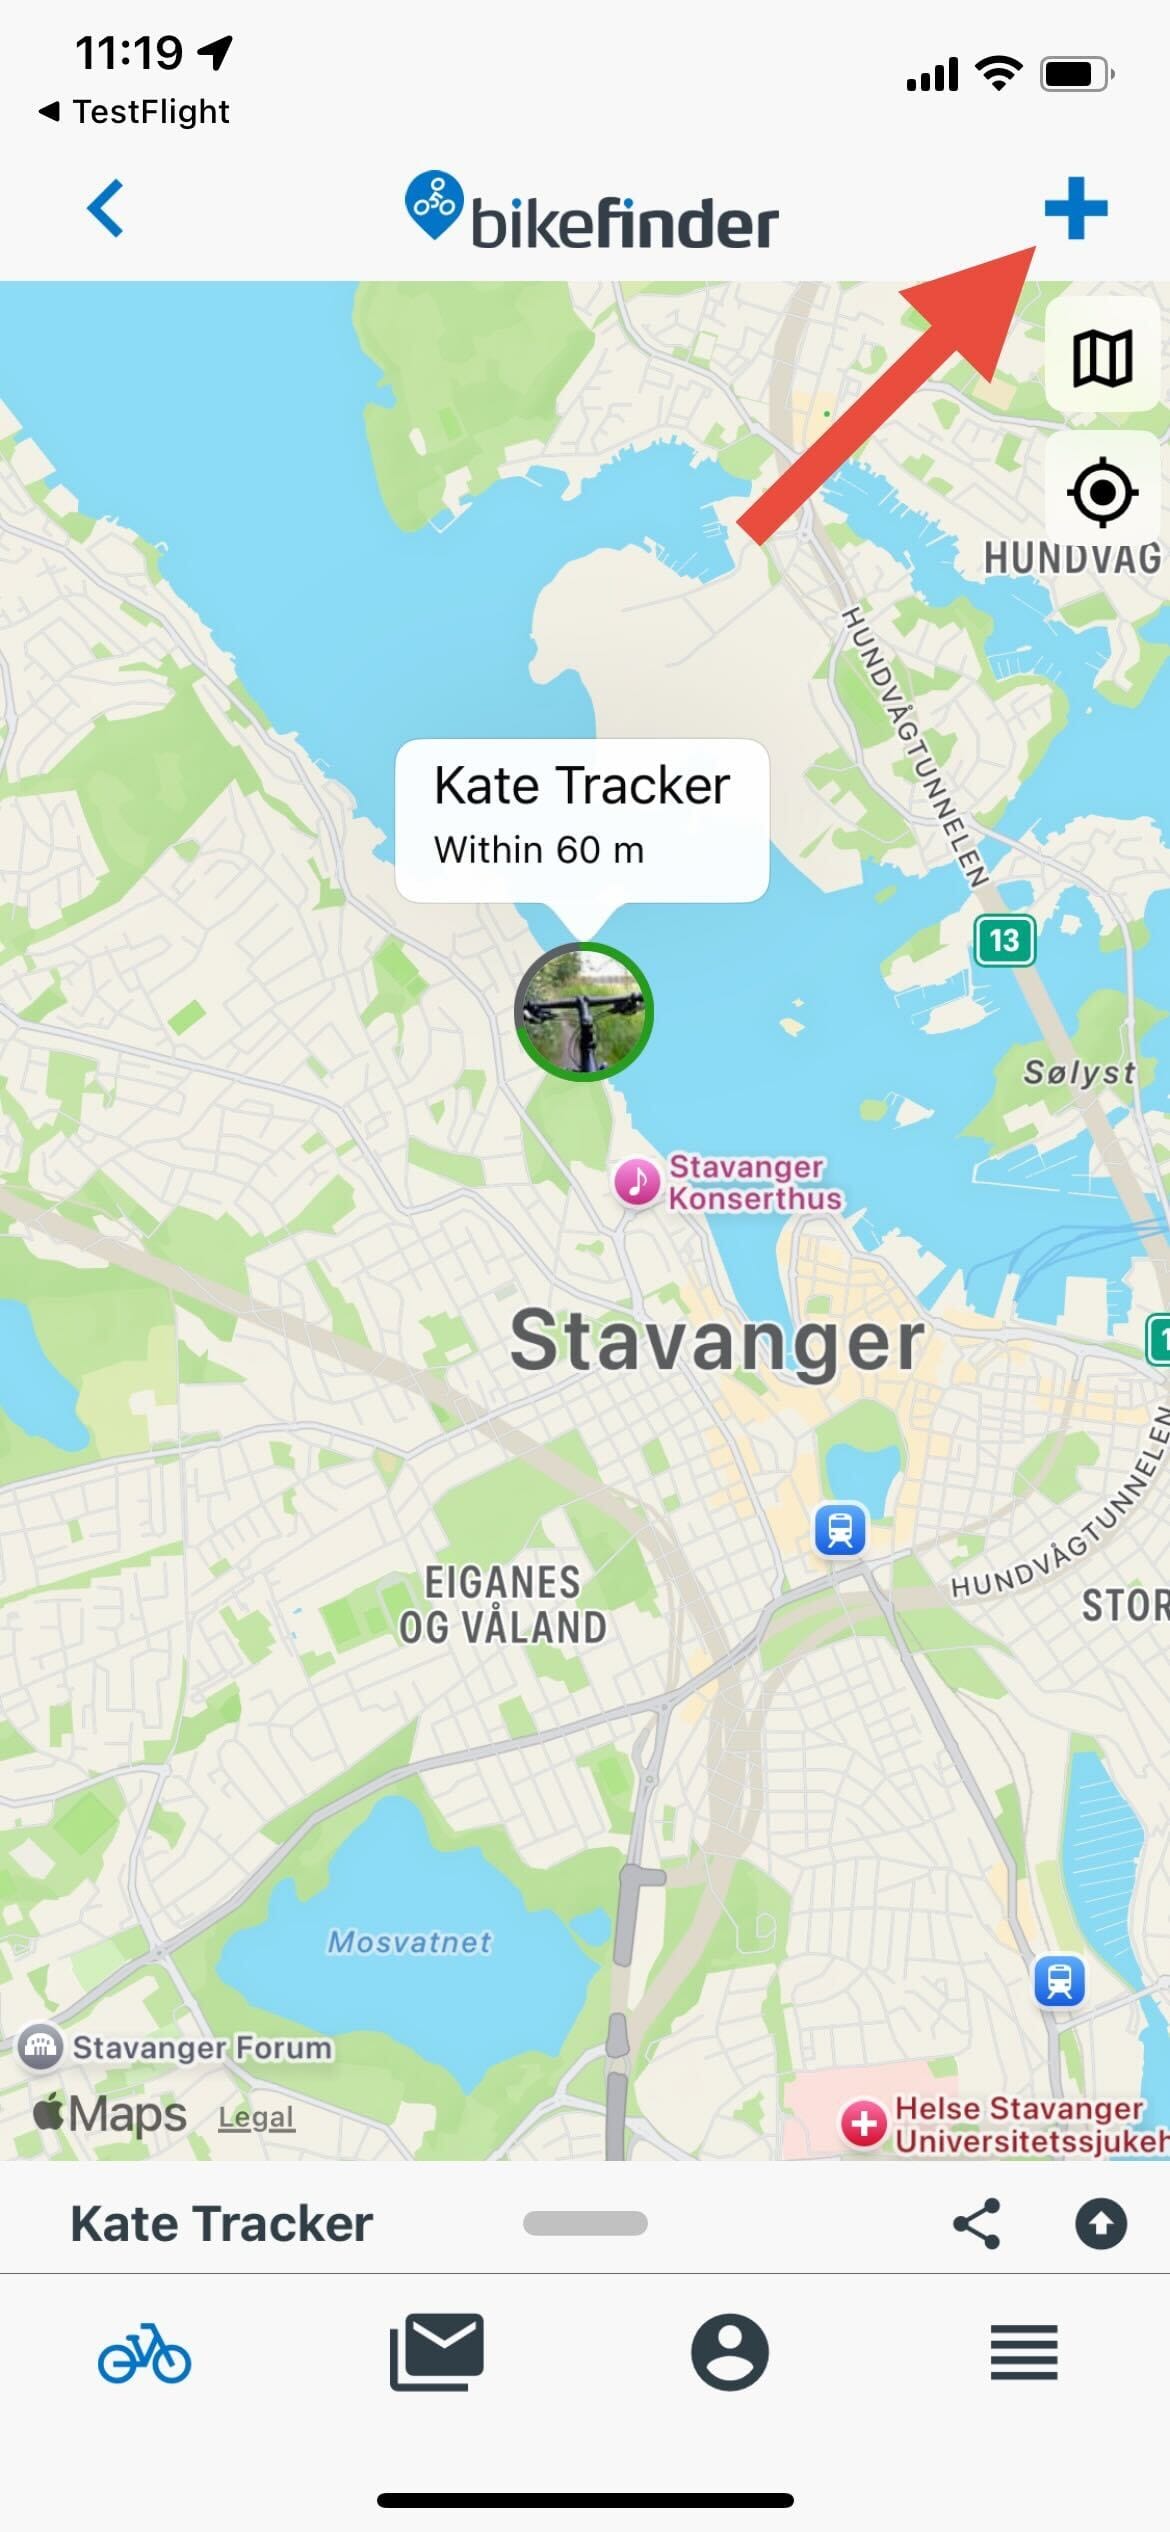
1. Click the ‘’+’’-symbol.

As it now starts searching for available trackers nearby, your tracker will show up. Make sure your phone is next to your tracker.
2. Click on the tracker that was recently added.
• You can rename your tracker
• You can add information about your bike, such as order confirmation/receipt and accessories
• You can add a picture of correctly installed tracker
• You can add a picture of your bike
Now that you have logged in and added your Bikefinder tracker to the App, you will need a subscription to activate the tracker’s functions. The RED triangle in the app warns you that the tracker has no active subscription.
➣ Buy a subscription, active, and update your tracker
Demonstration by video
You may find our Getting Started video here:
For the G1 tracker
For the Gen 2 tracker
BikeFinder Support [email protected]
Suggestions on how to improve this article?
Please submit a ticket below

